
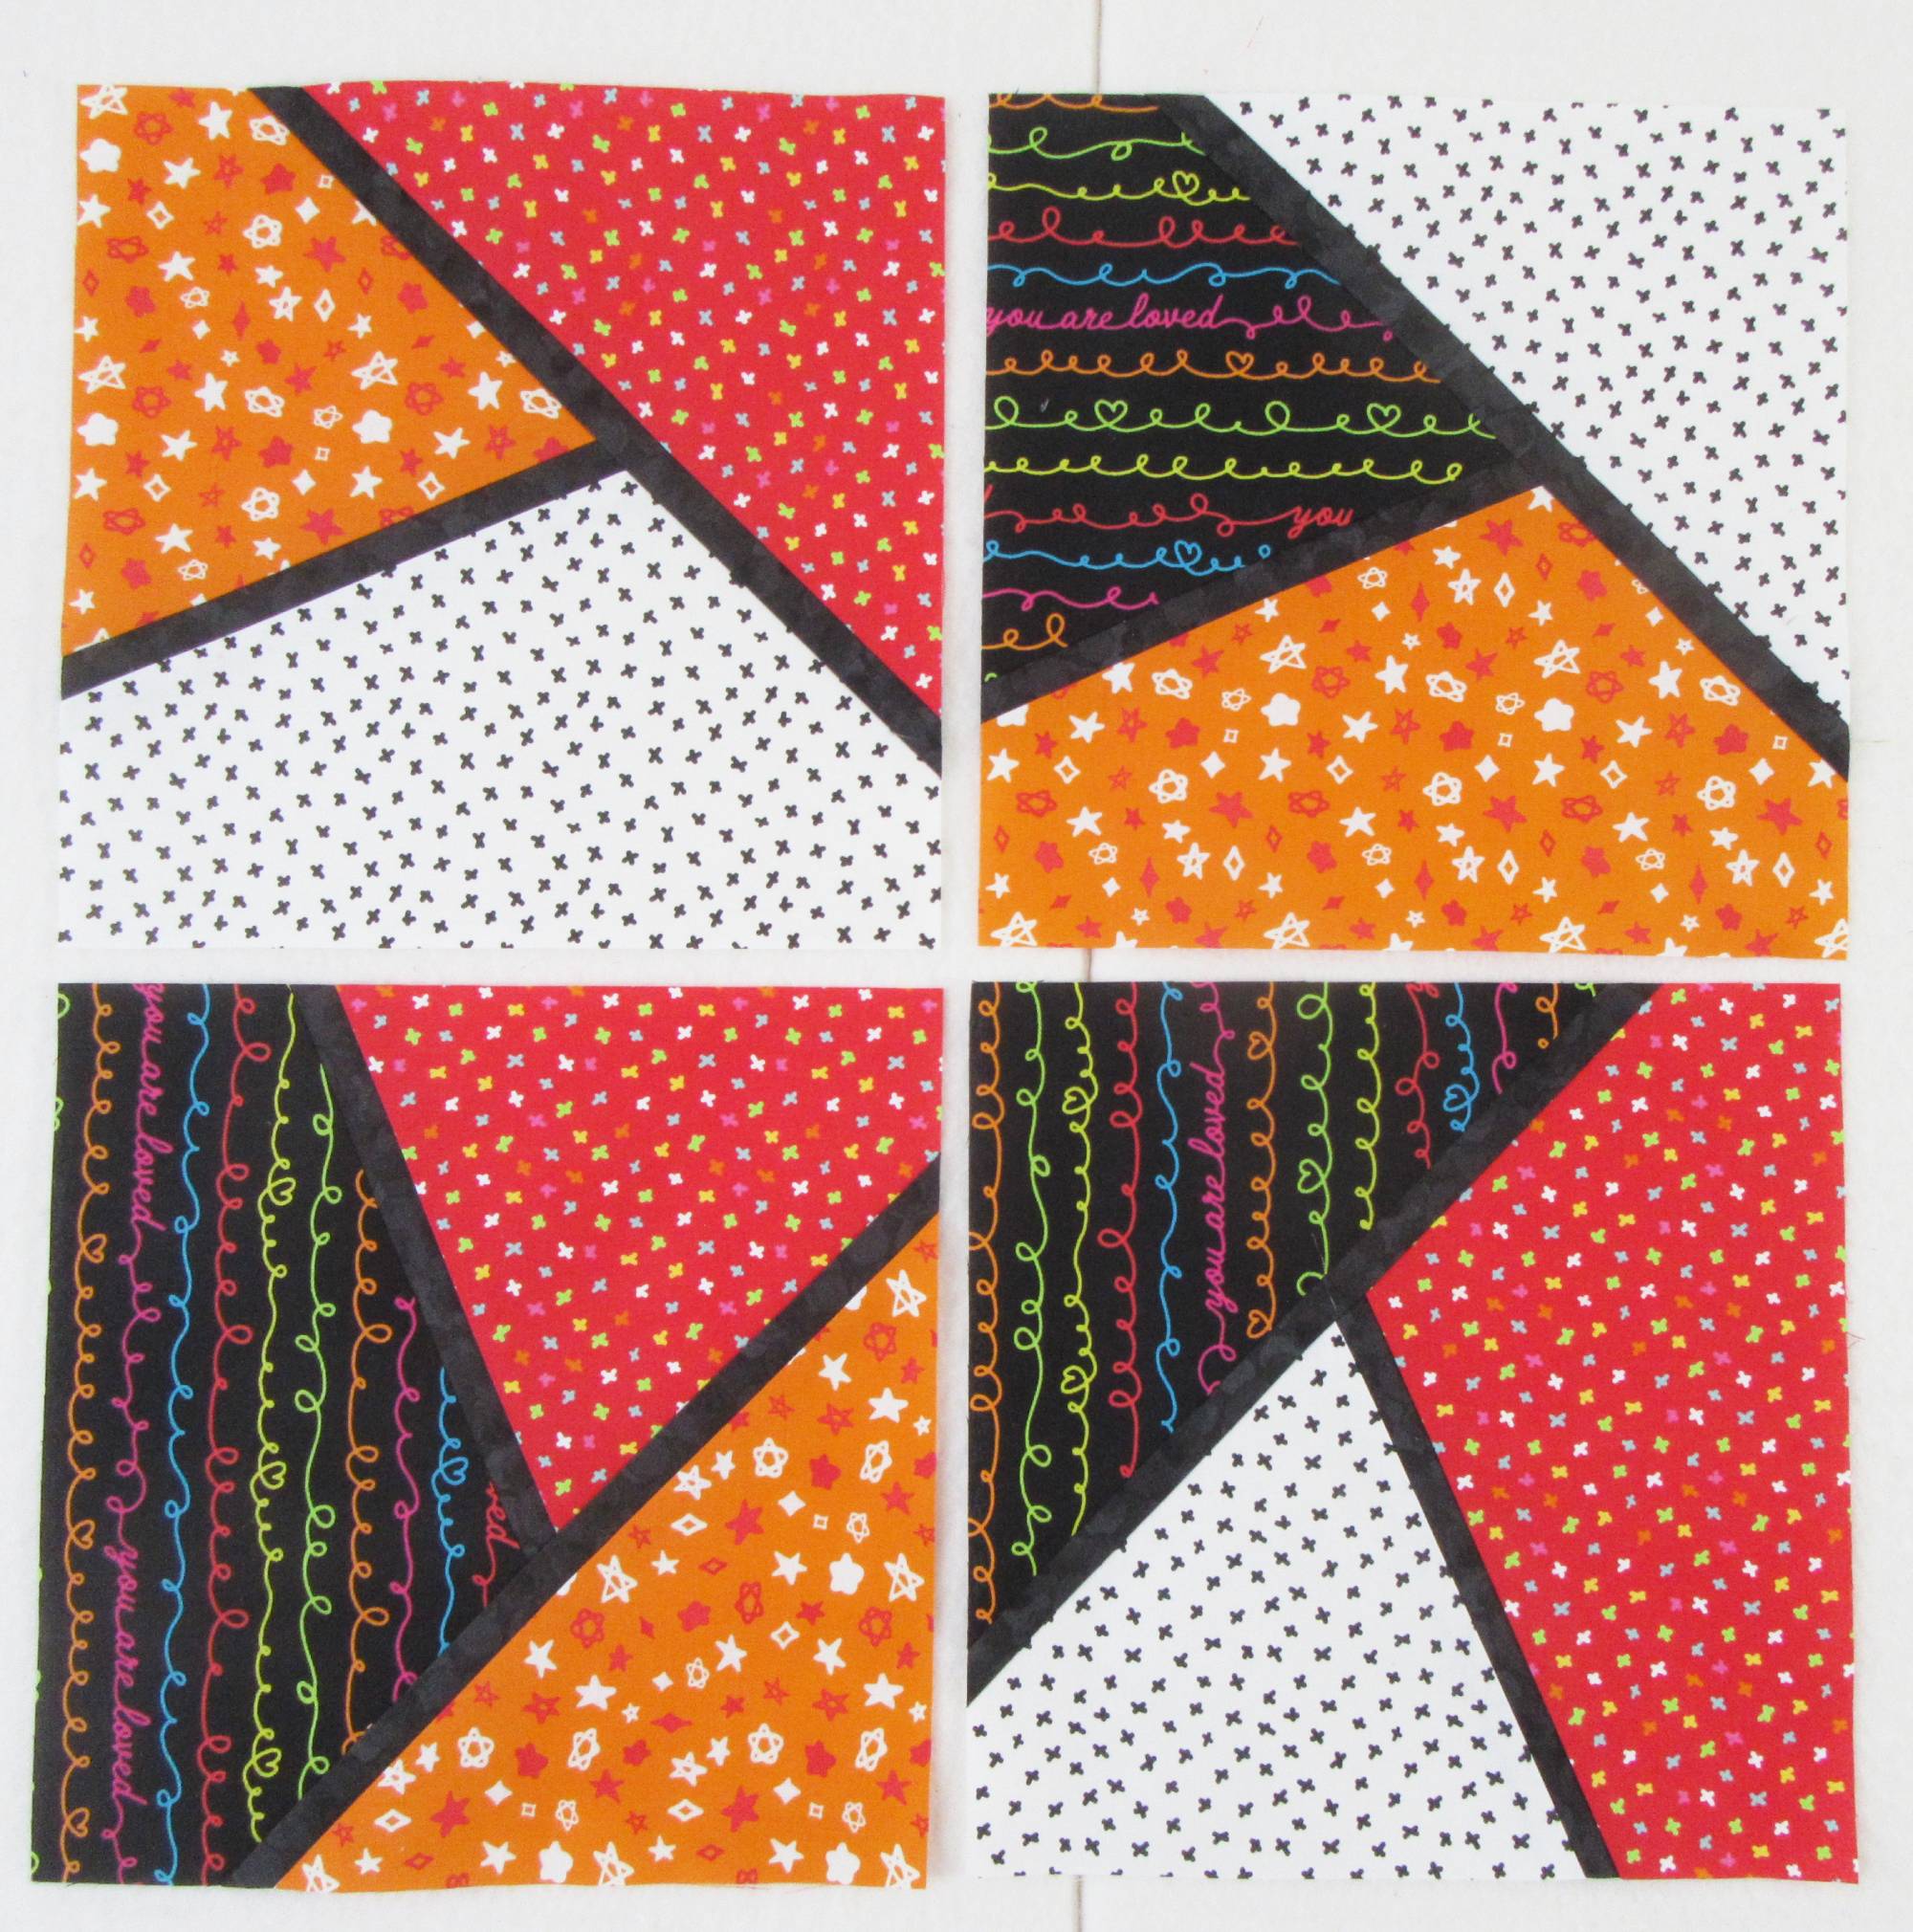
After cleaning and tidying my sewing room I had a few weeks break from cutting, piecing and quilting. Then a Layer Cake I bought several years ago called to me… I rejected the patchwork pattern I’d originally chosen for this brightly coloured ‘Creativity Glows’ fabric collection as it involved a lot of cutting and shuffling of pieces. I’m not keen on spending hours cutting up pre-cut fabrics – after all they’re already cut and to me that invites speedy piecing NOT cutting! AND the more a pre-cut is cut into smaller pieces the more fabric disappears into seams rather than being on show!
The brightly coloured prints got me thinking about stained glass quilts. After a bit of internet searching I found the ‘Mosaic’ quilt tutorial by Donna of Jordan Fabrics*. Donna’s quilt tutorial starts with a Layer Cake and involves cutting, adding narrow sashing, cutting again so that the final blocks are made of four irregular shapes cut from different Layer Cake squares, divided by sashing strips. The techniques demonstrated in the video tutorial gave me the confidence to go ahead with the variation I had in mind.
* Scrolling through the comments attached to the video tutorial I was very sorry to learn that Donna Jordan died last year. There is a touching obituary page with the opportunity to leave a message of condolance.
My variation on the Mosaic quilt involves less cutting as I wanted to create three rather than four irregular shapes from each Layer Cake square (to minimise the cutting and piecing AND keep the final block size as large as possible – more fabric bang for my bucks!).
STAINED GLASS/MOSAIC BLOCK TUTORIAL (Part 1 – preparation)
1 Sort the Layer Cake squares into ten groups of four squares and one group of two squares. I spent a bit of time distributing the squares to ensure there was good contrast between the prints in each of the groups.
2 Take one group of four squares. Lay them neatly on top of each other. Make two cuts through all the layers to create three irregular shapes.
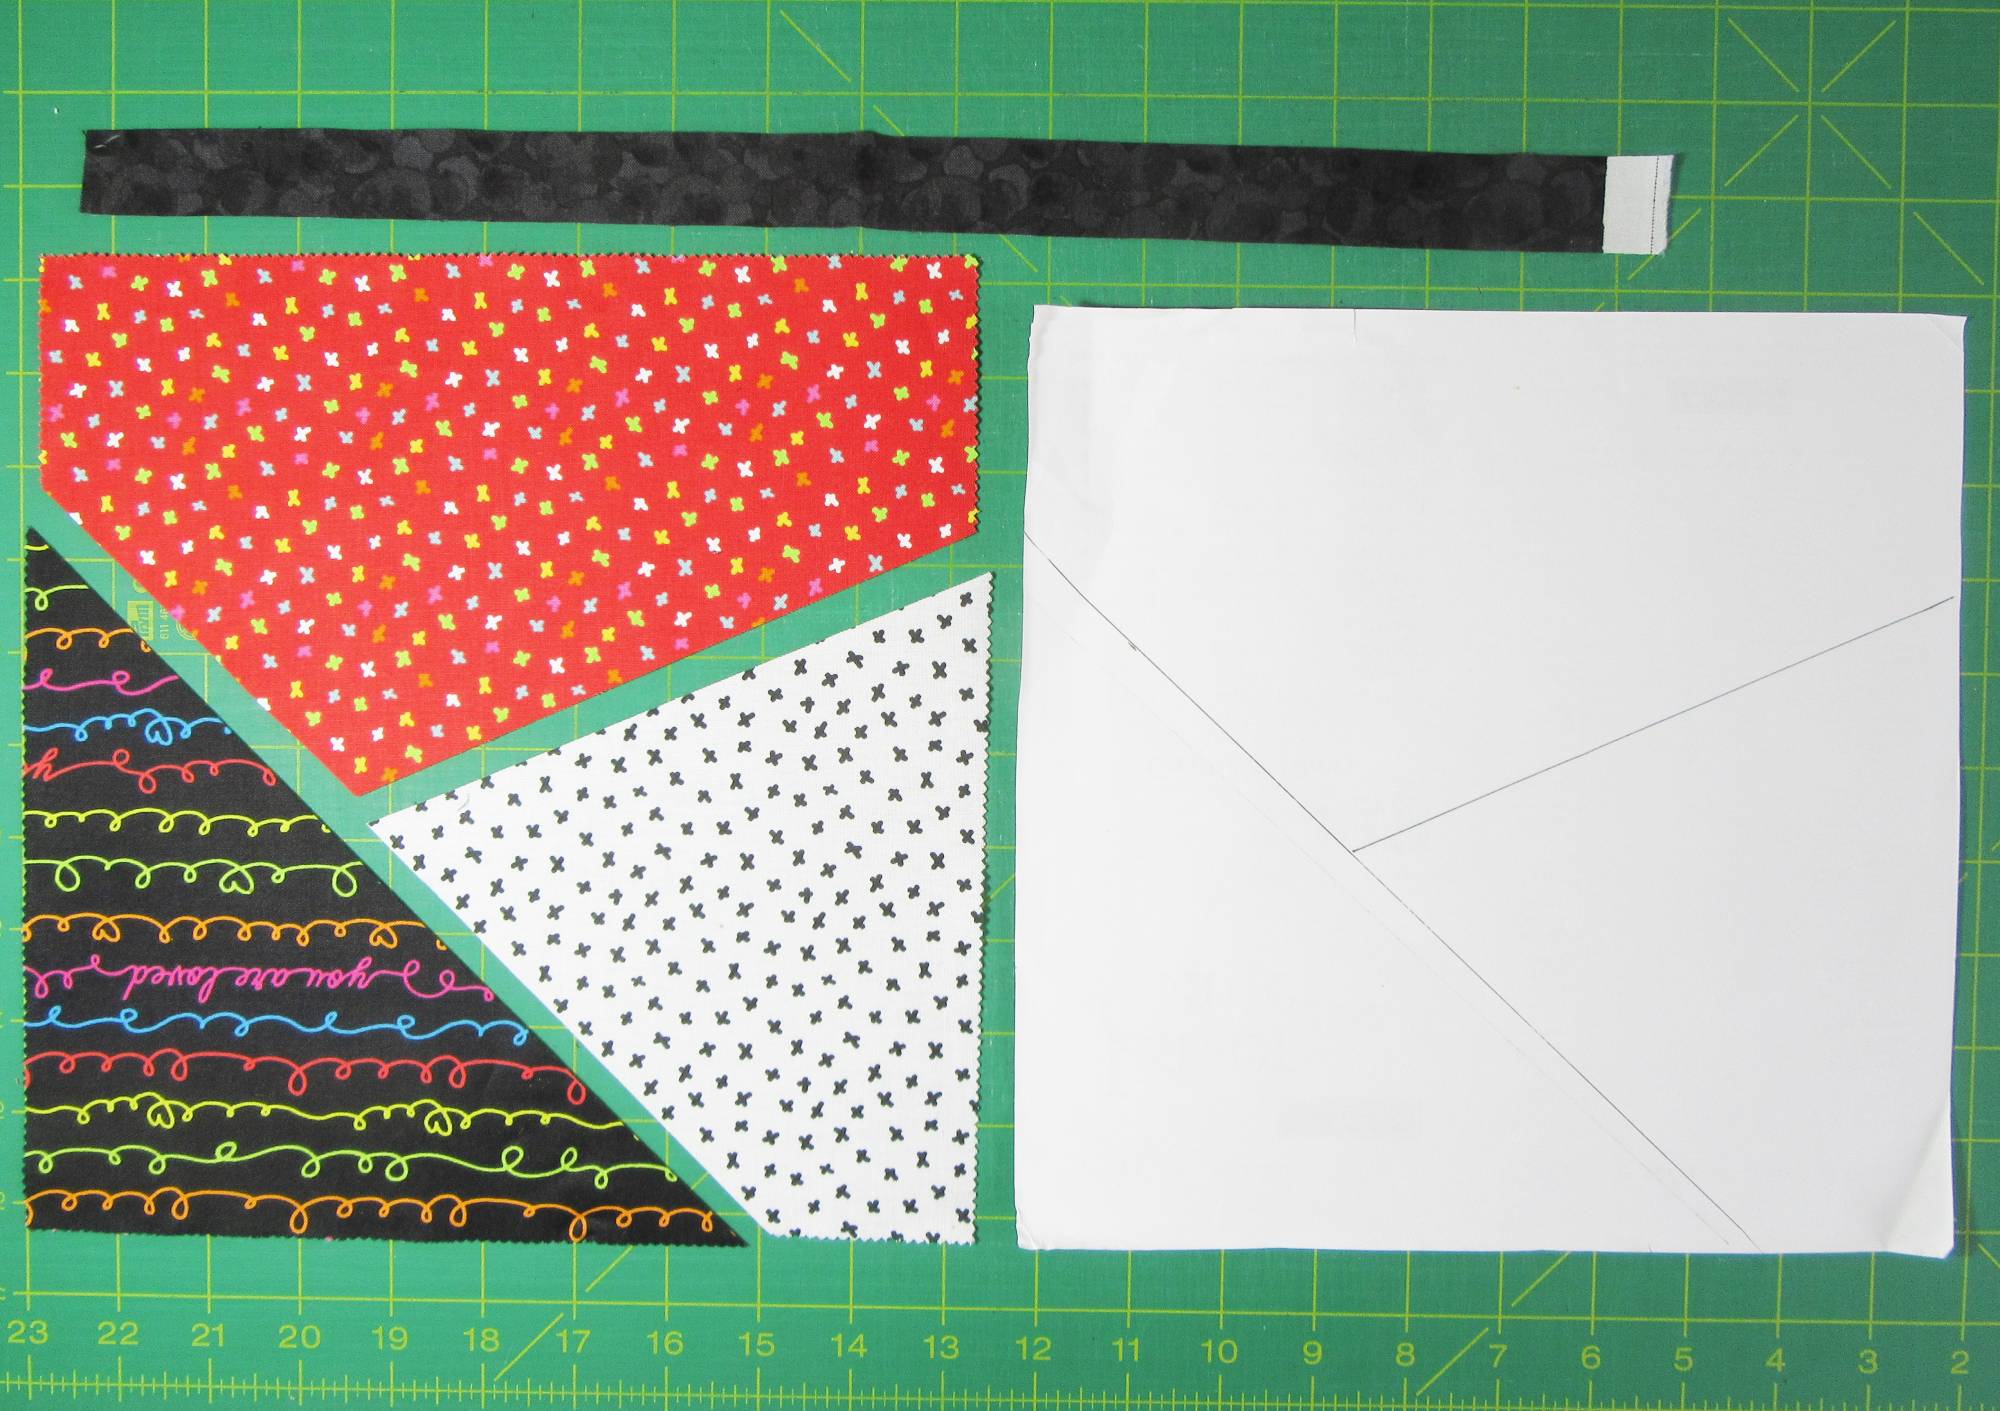
I used the backing paper from the Layer Cake pack to draw a rough guide of where I wanted to cut. I wanted the shapes to be fairly even in size and kept the cuts at least 1½” away from the corners of the squares to avoid having seams in the corners of my finished Blocks.
3 Shuffle the fabrics. I left one shape stack unshuffled; moved one fabric to the back of the second stack and moved two fabrics to the back of the third stack. NB. Handle these fabrics gently as they are cut on the bias and can easily be stretched out of shape!
4 Sashing fabric. Cut the sashing fabric into 1″ strips. I’m estimating 1 metre of fabric will be needed to make the Blocks, I’m not sure if more will be needed for sashing between the Blocks… I will update the quantity required once I’ve finished my quilt.
In Stained Glass/Mosaic Patchwork (Part 2) I’ll describe the process of piecing the Blocks along with any tips I discover as I make the Blocks.
Happy stitching!
Allison 🙂

0 Comments