

Working a few hours a week in retail is a good way of keeping ahead of the seasons! Currently the hottest items on the on-line order front include Halloween fabrics and Advent Calendar panels. Interestingly many are being posted across the Pond to USA. Some of these fabrics must have circumnavigated the Earth! Manufactured in SE Asia, distributed from the USA to Europe before making another long-haul journey via retailers to customers in N America or even Australasia!
Having cut several Advent Calendar panels for customers I decided it was about time I had a go at making one! I chose the ‘Merry & Bright Advent Calendar’ by Jane Farnham for Dashwood Studio, teaming it up with the fairy light print from the ‘Oh What Fun!’ collection by Liz Mytinger for Paintbrush Studio Fabrics.

After reading the rather sparse instructions printed on the panel, watching numerous advent calendar tutorials (links at the end of this page) and giving the whole process quite a bit of thought, I decided to keep the making of this project as simple as possible. In PART ONE of this tutorial I share the steps required to make the quilted backing, using a bagging method with the inclusion of hanging loops. PART TWO will have the steps required to prepare and attach the pleated pocket fronts.
PART ONE – MAKING THE QUILTED BACK PANEL
Step One – Prepare the Back Panel
- Press before using a rotary cutter or sharp scissors to cut out the printed Back Panel. The ‘Merry & Bright’ ‘Back Panel’ (with the printed squares showing where to attach the pocket fronts) measured 19″ wide x 23.5″ long including the ½” seam allowance.
- Cut the Quilt Backing fabric about 1″ larger all round than the printed Back Panel. I cut a piece of fabric 21″ x 25″.
- Cut a piece of wadding the same size as the Quilt Backing.
Step Two – Make the Hanging Loops
- Press and cut a 21″ x 4″ rectangle of fabric.
- Fold right sides together along the length of the rectangle and stitch a ¼” seam. Press the seam open before turning the tube right sides out.
- Flatten the fabric tube, positioning the seam down the centre back.
- Top stitch 1/8th inch in from the edge down the long edges of the tube.
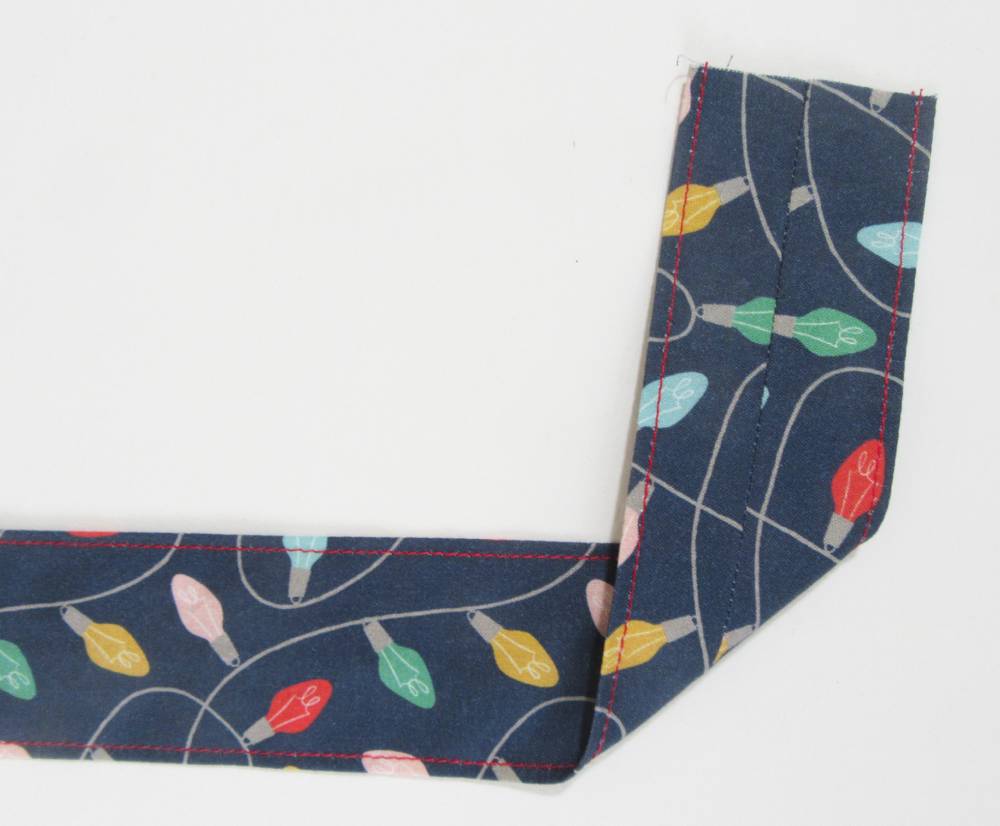
- Sub-cut the tube into four 5″ x 1¾” rectangles.
Step Three – Create the Quilted Back Panel
- Lay the wadding on a flat surface.
- Centre the quilt backing, right side up on the wadding.
- Centre the printed Back Panel, right side down, on to the quilt backing.
- Fold each Hanging loop in half width-ways (folded, each loop measures 2½” x 1¾”).
- Use a ruler to carefully position the Loops along the top edge of the quilt sandwich, tucking them between the Quilt Backing and the printed Back Panel. The raw ends of the loops should be just visible above the top edge of the printed Back Panel (see photo below). The first and fourth Loops should be positioned approximately ½” within the side seam allowances. Pin the Loops in position.

- Lightly pin baste the quilt sandwich.
- Stitch the layers together by following the printed seam allowance. Leave a 4″ opening on one edge.
- Trim away the excess quilt backing and wadding from beyond the seam allowance. Carefully snip across the corners to reduce fabric bulk.
- Gently turn the quilt sandwich right sides out. Push out the corners. Finger press all around the edge to help flatten the seams.
- Stitch closed the opening.
- Pin baste the layers together, smoothing fabric from the centre to the edges.

- Using a walking foot quilt the layers together. I chose to first follow the inside edge of the printed border using 40wt thread and a zig-zag stitch. Then I straight stitched ¼” in from the edge all around the quilt sandwich.
That’s the end of PART ONE of this Advent Calendar tutorial. In PART TWO I will share the steps to making and attaching the pleated pocket fronts.
As promised here are the links to some of the Advent Calendar tutorials I watched before coming up with the method shared above:
- How to sew an Advent calendar panel with pleated pockets by Melanns Fabric & Sewing Centre
- Fabric Advent Calendar Tutorial by Hobbycraft
- Advent Calendar Panel Sewing tutorial by Craft House Magic
- Fabric Panel Advent Calendar Sew Along by Claire England.
There are so many variations and methods to constructing these Advent Calendar panels! I chose a very simple method for this project using the minimum of additional materials. No extra borders, embellishments, fancy quilting or binding… Maybe next time?
Find out how to make and attach the pleated pocket strips by using this link to Part Two of How to make an Advent Calendar from a fabric panel.
Allison

0 Comments